From Photo to 3D Model: AI Image to 3D Converter Guide | Cliptics
You've got a photo. Maybe it's a product shot. Maybe it's concept art. Maybe it's just something you found that would be perfect for your project. And you need it as a 3D model.
Used to be, you'd have to model it from scratch. Spend hours in Blender or Maya, manually building geometry, unwrapping UVs, texturing. Even simple objects took forever. Complex ones? Forget about it.
AI changed that equation completely. Now you can upload an image and get a 3D model back. Not a flat plane with the image stuck on it. An actual dimensional mesh with depth and geometry that you can rotate, light, and use in your scene.
Let me show you how this actually works and when it makes sense to use it.
Understanding the Conversion Process
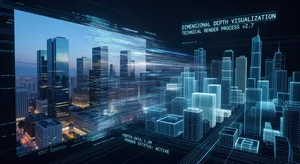
The tech behind image to 3D conversion is built on some pretty sophisticated AI that learned to predict depth from 2D information.
Think about how your brain sees depth in a photo. Shadows, perspective, occlusion, all these visual cues tell you what's in front and what's behind. AI does the same thing, but it outputs that depth information as actual 3D geometry.
The process happens in stages. First, the AI analyzes your image and builds a depth map. That's basically a grayscale image where brightness represents distance from camera. Brighter areas are closer, darker areas are further away.
Then it converts that depth map into actual geometry. Either through mesh generation where it creates polygons, or through volumetric reconstruction where it builds the shape in 3D space.
Finally, it projects your original image onto the geometry as texture. So you end up with a 3D object that looks like your photo from the original angle.
The quality depends heavily on your source image and the AI model being used. Some handle complex shapes better. Others are optimized for certain object types.
When This Makes Sense to Use
Not every modeling task needs AI conversion. Let me be practical about where this shines.
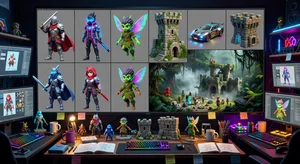
If you're building game assets and need background objects that players won't inspect closely, this is perfect. Trees, rocks, building facades, all that environmental stuff. Convert photos, drop them in your scene, move on.
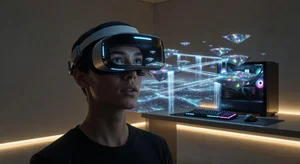
For AR and VR projects where you need to populate spaces quickly, photo-to-3D conversion is a massive time saver. You can build entire environments from reference photos instead of modeling every single element.
Product visualization is another solid use case. If you've got product photos and need 3D versions for your website or app, AI conversion gets you 80% there in minutes instead of hours.
Concept development benefits too. When you're early in the design phase and just need to see how something might look in 3D, quick conversion lets you iterate faster than traditional modeling.
On the flip side, if you need perfect topology for animation or close-up hero assets, you're probably better off modeling properly. The meshes from AI conversion tend to be dense and irregular. They work fine for static objects but aren't ideal for deformation.
Step-by-Step: Converting Your First Image
Let's actually do this. Here's the workflow from photo to finished 3D model.
Step 1: Choose the right source image
Not all photos work equally well. You want clear, well-lit images with the subject clearly defined against the background.
Front-facing shots of single objects work best. Complex scenes with multiple overlapping subjects confuse the AI. Side angles are harder than straight-on views.
High resolution helps. More pixel information gives the AI more to work with when predicting depth and building geometry.
Step 2: Select your output format
Different tools export different formats. OBJ and FBX are most common for general 3D work. GLTF if you're targeting web or mobile. USDZ for AR on iOS.
Think about where the model will end up. Game engines, rendering software, and AR frameworks all have format preferences. Pick the one that matches your pipeline.
Step 3: Run the conversion
Upload your image to your chosen tool. Most AI image to 3D converters have a simple interface. Image goes in, 3D model comes out.
Some tools let you adjust parameters. Depth intensity, mesh density, texture resolution. Start with defaults and tweak only if you need to.
The processing time varies. Simple objects might convert in under a minute. Complex images could take 5 to 10 minutes depending on the AI model and server load.
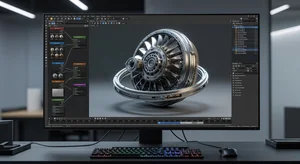
Step 4: Import and inspect
Download your model and bring it into your 3D software. Rotate it around. Check the topology. See how it looks from different angles.
The front view should match your source image pretty closely. Side and back views will be the AI's best guess at what's there. Sometimes it nails it. Sometimes the geometry gets weird.
Look for common issues. Mesh artifacts, missing faces, inverted normals. These are all fixable but you need to spot them first.
Step 5: Clean up the geometry
This is where you make it production-ready.
The mesh from AI conversion is usually way denser than it needs to be. Run a decimation pass to reduce polycount without losing too much detail. Your frame rate will thank you later.
Check the UV unwrap. AI-generated UVs are functional but rarely optimal. If you need to edit textures or add detail maps, you might want to re-unwrap manually.
Fill any holes or fix topology issues. Most 3D software has tools for this. It's usually faster than starting from scratch even with cleanup work.
Comparing Output Formats
Different export formats serve different needs. Here's what you should know about each.
OBJ is the universal standard. Works everywhere. But it doesn't support animation data or advanced material properties. Good for static assets.
FBX handles everything. Geometry, textures, animations, materials. It's the go-to for game engines and animation software. Bigger file sizes but more complete.
GLTF is optimized for web and mobile. Smaller files, efficient loading, good for AR and WebGL applications. Not ideal for offline rendering.
STL is for 3D printing. Just geometry, no textures. If your goal is physical fabrication, this is what you want.
USDZ is Apple's AR format. iOS and macOS specific. Great for AR experiences on those platforms but not widely supported elsewhere.
Pick based on your end use. You can always convert between formats later but starting with the right one saves steps.
Getting Better Results
The difference between okay results and great results often comes down to a few key factors.
Your source image matters most. Clean backgrounds make separation easier. Even lighting avoids weird shadows being baked into geometry. Sharp focus gives the AI clear edges to work with.
If you can, shoot or find images specifically for conversion. Straight-on angles, neutral lighting, uncluttered background. Professional product photography usually converts beautifully because it's already optimized for clarity.
For objects, multiple photos from different angles work better than single shots when tools support multi-image input. The AI can triangulate depth more accurately with multiple viewpoints.
And sometimes preprocessing helps. Remove the background entirely if your tool struggles with separation. Enhance contrast if details are muddy. Basic image editing before conversion can significantly improve output quality.
Integration Into Real Workflows
Let's talk about how this fits into actual production pipelines.
For game development, AI conversion works great for background props and environmental clutter. Build your library of rocks, plants, debris, all the stuff that fills out a scene. Then focus your manual modeling time on hero assets that matter.
In AR and VR, quick asset generation speeds up prototyping dramatically. You can populate an entire virtual environment from reference photos, test the experience, then replace with proper models only for the elements that need refinement.
Archival and preservation projects use this too. Converting historical photos into 3D representations. Creating virtual museums from 2D archives. The tech opens up applications beyond traditional entertainment.
Product teams building 3D commerce experiences can turn their existing photo libraries into interactive 3D models. Customers can rotate and inspect products in ways static images don't allow.
The key is knowing when to use it and when to model properly. It's a tool in the toolbox, not a replacement for traditional 3D workflows.
Common Issues and Fixes
You'll run into predictable problems. Here's how to handle them.
Flat or incorrect depth happens when the AI can't figure out the geometry. Usually because the source image lacks depth cues. Try an image with better perspective or clearer lighting.
Mesh artifacts and holes show up especially around complex edges. Clean these up manually in your 3D software. It's tedious but necessary for quality assets.
Texture stretching occurs when the UV mapping doesn't match the geometry well. Re-unwrap problem areas or paint over stretches in your texture editor.
Reversed faces make parts of your model disappear or look wrong. Flip normals in your 3D software. Usually a quick fix.
And if the whole model just looks wrong, sometimes it's easier to try a different source image than fight with problematic geometry.
Tools and Services Worth Trying
The landscape changes fast, but a few tools consistently deliver good results.
If you want something simple and web-based, there are several services that handle the whole process browser-side. Upload, wait, download. No installation needed.
For more control, desktop tools that run locally give you parameter adjustment and batch processing. Trade-off is you need decent hardware and some technical setup.
Some platforms offer APIs if you're building this into a larger pipeline. Automate the conversion process for hundreds of images. Useful for asset generation at scale.
And there are plugins for major 3D software that bring the conversion directly into your existing workflow. Generate models without leaving Blender or Maya.
If you're looking for alternatives or want to generate 3D from text descriptions instead of images, tools like AI text to 3D generators offer a different approach to the same end goal.
Looking Forward
This technology improves noticeably every few months.
We're seeing better handling of complex materials. Transparent objects, shiny surfaces, translucent materials. All things that used to break conversion are getting more reliable.
Multi-view reconstruction keeps getting smarter. Feed it several photos of an object from different angles and the AI builds increasingly accurate models.
Real-time conversion is becoming viable. Upload an image, see the 3D model generate live. Iterate faster, experiment more freely.
And integration with other AI tools creates interesting workflows. Generate an image with AI, convert it to 3D, use it in your scene. End-to-end AI-assisted asset creation.
For anyone working in 3D, this is worth learning. Not as a replacement for modeling skills, but as another technique that expands what's possible in the time you have.
Your next project probably has use cases for this. Background assets, quick mockups, concept visualization. The barrier to getting started is basically zero. Pick an image, run it through a converter, see what you get.
Worst case, you've learned something about the process. Best case, you've unlocked a workflow that makes you significantly faster at building 3D content.
Either way, it's worth the hour to try.