Image Upscaling: Enlarging Without Quality Loss | Cliptics
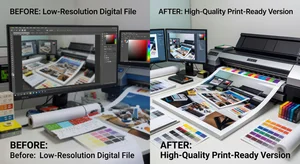
The client email hit my inbox at 11 PM: "The logo they sent is 200x200 pixels. We need it billboard-sized for tomorrow." My stomach dropped. You can't create resolution that doesn't exist. Enlarging tiny images produces pixelated disasters.
Or at least, that used to be true. AI upscaling has fundamentally changed what's possible when you need to enlarge images without quality loss. After two years of testing every upscaling approach and tool, I've developed workflows that consistently deliver print-quality results from surprisingly limited source material.
This isn't magic. It's understanding how modern upscaling works and knowing exactly when and how to apply it.
Understanding The Upscaling Problem
Traditional image enlargement fails for a simple reason: it's guessing. When you tell software to make a 500-pixel image into a 2000-pixel image, it needs to invent 75% of the pixels. Classical algorithms like bicubic interpolation make educated guesses based on surrounding pixels, but they're fundamentally limited.
The result is blurriness, jagged edges, and that characteristic "enlarged too much" look. Fine details become muddy. Text loses sharpness. Textures turn into smudged approximations.
For print designers, this creates painful constraints. A 72 DPI web image can't become a 300 DPI print without looking terrible. You're stuck with the resolution you started with, or you're redoing the work from scratch.
Print work requires specific minimum resolutions depending on output size and viewing distance. A magazine ad at 8x10 inches needs roughly 2400x3000 pixels at 300 DPI. A billboard viewed from distance can get away with 20-30 DPI, but that still means massive absolute resolution for large formats.
When source images don't meet these requirements, you either accept quality loss, remake the content, or find better upscaling solutions.
How AI Upscaling Changes Everything
AI upscaling works fundamentally differently. Instead of mathematically interpolating pixels, trained neural networks recognize patterns and reconstruct detail based on what similar images typically contain.
If you upscale a blurry face, the AI doesn't just smooth pixels. It understands facial structure and adds details like skin texture, hair strands, and realistic features that match the input. For text, it recognizes letters and regenerates crisp edges. For textures, it extrapolates realistic patterns.
The results can be startling. I've successfully upscaled images 4-8x their original size for print projects that clients never questioned. The output looks like it was photographed at high resolution originally.
But AI upscaling isn't perfect or automatic. It has specific strengths, limitations, and scenarios where it excels or fails. Knowing the difference determines whether you get usable results or hallucinated nonsense.
When AI Upscaling Works Best
Through extensive testing, I've identified patterns in what upscales well and what doesn't:
Photographs with clear subjects upscale beautifully. Portraits, product photography, landscapes. if the original image is sharp at its native resolution, AI upscaling can extend that quality to much larger sizes. I regularly upscale 1000-pixel images to 4000+ pixels for print without visible quality loss.
Clean graphics and logos with solid colors and defined edges upscale reliably. The AI recognizes shapes and regenerates crisp boundaries. This is perfect for vector-style graphics that were unfortunately saved as rasters at low resolution.
Text and typography see dramatic improvements. Blurry text becomes readable. Jagged edges become smooth. I've rescued countless PDF screenshots and low-res logos this way.
Textures and patterns that are recognizable upscale well. Fabric, wood grain, metal surfaces. the AI extrapolates realistic detail that maintains visual consistency with the source.
When Upscaling Fails
Not everything works. Some scenarios consistently produce poor results:
Already-degraded images. If your source is heavily compressed, has artifacts, or is extremely blurry, upscaling amplifies those problems. The AI might clean up some issues, but it can't reconstruct information that's completely absent. Garbage in, garbage out still applies.
Complex technical illustrations with precise details often fail. The AI might misinterpret technical diagrams, circuit board layouts, or detailed mechanical drawings. For these, I upscale conservatively (2x maximum) or recreate the image.
Images with moiré patterns or heavy noise. These confuse upscaling algorithms. The AI tries to "correct" patterns that are actually artifacts, creating bizarre results. Pre-processing to remove artifacts before upscaling helps.
Content that requires factual accuracy. If you're upscaling medical imagery, scientific data visualization, or legal documents, be cautious. The AI might add "plausible" details that are factually wrong. Verify critical content hasn't been altered.
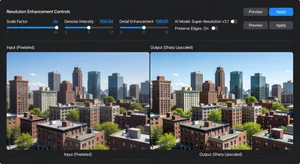
Practical Upscaling Workflow
Here's the systematic approach I use for print design projects:
Step 1: Assess the source. I examine resolution, sharpness, compression artifacts, and overall quality. This determines realistic upscaling targets. A sharp 1000-pixel image can reach 4000+ pixels. A blurry compressed 1000-pixel image might only reliably reach 2000 pixels.
Step 2: Pre-process if needed. For images with noise or compression artifacts, I clean them before upscaling. Noise reduction, subtle sharpening, and artifact removal improve upscaling results. I use AI image editors for selective corrections.
Step 3: Choose the right upscaling approach. Different tools excel at different content types. For general photography, I use AI upscalers optimized for natural images. For graphics and text, I prefer tools trained on sharp-edged content.
Step 4: Upscale in stages. For large increases (6x or more), I upscale incrementally. 2x, then 2x again, then final touch-up. This often produces cleaner results than one aggressive upscale.
Step 5: Post-process the output. Upscaled images sometimes need subtle refinement. I adjust sharpening, check for AI-introduced artifacts, and fine-tune color balance. Minor corrections dramatically improve final quality.

Step 6: Test print. Before committing to full production, I print a small test. Screen display and print appearance differ enough that verification matters. This catches issues like unexpected color shifts or details that don't hold up at final size.
Print-Specific Considerations
Print design adds requirements beyond basic upscaling:
Color space conversion. Upscale in RGB, but convert to CMYK after checking the results. Some upscaling AI is optimized for RGB and produces weird results if you feed it CMYK. Handle color space conversion as a separate final step.
Resolution targets. For offset printing and high-quality magazines, aim for 300 DPI at final size. For large-format (posters, banners), 150-200 DPI usually suffices. For billboards and distant-viewing applications, even 50-100 DPI can work. Match your upscaling target to the actual requirement. don't over-upscale unnecessarily.
Bleed and safety margins. Upscale to dimensions that include bleed. It's frustrating to upscale perfectly for trim size, then realize you need extra pixels around the edges. Plan for the actual print specifications including bleeds.
Format considerations. Save upscaled images in formats that preserve quality. TIFF for print production. High-quality JPEG (95+) if file size is constrained. Avoid additional compression after upscaling. you've already pushed the image, don't degrade it further.
Handling Common Client Scenarios
Real-world print design involves recurring situations where upscaling becomes necessary:
Old logo files. Clients send their "logo" that's actually a 150-pixel screenshot from their website. AI upscaling can often rescue these, though vector recreation is preferable when possible. I upscale, clean up, and deliver usable print files while recommending they source proper vectors.
Social media images for print. Marketing wants to use that viral Instagram image in a magazine ad. It's 1080 pixels. Not ideal, but upscaling to 2500-3000 pixels for a half-page ad usually works. I communicate limitations upfront and manage expectations.
Photo submissions from amateur sources. Event photography from attendees. User-generated content contests. Influencer collaborations. You get widely varying image quality. Upscaling tools help standardize output quality when source material is inconsistent.
Historical materials. Reprinting archived designs or old marketing materials where original high-res files no longer exist. Scanning old prints only gets you so far. Upscaling the scans recovers additional detail for modern reproduction standards.
Quality Assurance Standards
How do you know if upscaled images meet print quality? I use specific evaluation criteria:
Edge sharpness. Zoom to 100% and examine edges between contrasting areas. They should be clean and defined, not fuzzy or stairstep-jagged. If edges look soft, try different upscaling parameters or additional sharpening.
Texture consistency. Look at areas that should have texture (skin, fabric, surfaces). The AI-generated texture should look realistic and consistent with the original style. Watch for artificial patterns or repetitive details the AI fabricated.
No hallucinations. Sometimes upscaling AI invents details that weren't in the source and don't match reality. Extra fingers on hands. Weird textures in backgrounds. Text that changes. Carefully review the upscaled image against the original to catch these.
Print preview. Many design applications offer print preview modes that simulate how images will appear at final output resolution. Use these to evaluate upscaled images in context.
Technical Limitations To Know
Despite impressive capabilities, AI upscaling has hard limits:
You can't create information that's completely absent. If a face is so small and blurry in the original that features are indistinguishable, upscaling will generate plausible-but-invented features. This might look good but isn't accurate. Know when you're enhancing versus inventing.
Resolution multiplication caps. Most upscaling works well up to 4x. Beyond that, quality degrades. If you need 8x or 16x enlargement, question whether upscaling is the right approach or if content needs recreation.
Processing time and resources. Large upscaling jobs (8000+ pixel outputs) take time and considerable computing power. Plan accordingly for project timelines. Batch processing overnight for production runs.
Tools That Deliver Results
For print design work, I rely on specific tools proven for professional output:
AI image upscaler tools handle general photography and graphics. Image compression optimization helps manage file sizes post-upscaling. Portrait enhancers work specifically well for people-focused imagery.
I avoid generic "enhance" tools that don't specify their upscaling methodology. Professional print work requires predictable, consistent results. Stick with tools that explain their process and deliver reliably.
When To Walk Away
Sometimes upscaling isn't the answer. I turn down or redirect projects when:
- Source quality is so poor that upscaling would produce unacceptable results
- Client expectations require impossible quality gains
- Content requires factual accuracy that AI might compromise
- Vector recreation or reshooting would produce measurably better outcomes
Being honest about limitations builds more trust than overpromising and underdelivering. I explain what's possible, show examples, and recommend alternatives when appropriate.
The Future Of Print Quality
AI upscaling continues improving. Models trained on larger datasets. Better detail preservation. Fewer artifacts. What was impossible two years ago is routine now. What's difficult today will be easy tomorrow.
For print designers, this is transformative. Resolution constraints that once dictated project possibilities are loosening. Low-res sources that would have killed projects now become workable. Quality standards become more achievable across varied content sources.
But the fundamentals remain: start with the best source material possible, apply upscaling intelligently, verify results carefully, and know when technology helps versus when it hides problems.
Master these principles, and image upscaling becomes one of your most powerful tools for delivering print quality regardless of source limitations.