Portrait Enhancement: AI Retouching Best Practices 2026 | Cliptics
I over-retouched a client portrait once. Smoothed skin so much she looked plastic. She asked for the original back.
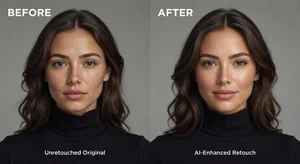
Portrait enhancement walks a fine line between improvement and destroying natural character. AI tools make retouching easier but knowing when to stop remains critical.
The free AI portrait enhancer automatically improves portraits while maintaining natural appearance when used correctly.
Natural Versus Over-Processed
Best portrait enhancement looks like the person had great lighting and good skin day. Not like they went through aggressive filters.
Over-smoothed skin loses texture and pores. Looks artificial. Enhance but don't erase natural skin characteristics.
AI enhancement should improve what's there, not create completely different appearance. Person should still look recognizably themselves.
Test enhancements by showing enhanced version next to original. If the change is too dramatic or makes subject look unrecognizable, dial it back.
Skin Retouching Approaches
Blemish removal makes sense. Temporary imperfections like pimples or scratches. But freckles, beauty marks, natural skin texture should usually stay.
Smoothing should be subtle. Remove extreme texture from poor lighting or camera settings. Don't remove all skin texture entirely.
The AI image upscaler can sharpen portraits while AI retouching smooths selectively. Combine both for best results.
Different age groups need different approaches. Young skin needs minimal smoothing. Mature skin benefits from subtle texture softening but still needs character lines preserved.
Lighting and Color Correction
AI can fix underexposure or color casts effectively. Bringing up shadows, correcting white balance, balancing skin tones.
Avoid over-brightening. Portrait should maintain natural light falloff and dimension. Flat even lighting everywhere looks artificial.
Color grading sets mood. Warm tones feel intimate. Cool tones feel professional. Match color treatment to portrait purpose.
Check skin tone accuracy across different skin colors. AI sometimes shifts darker skin tones incorrectly. Manual verification prevents poor results.
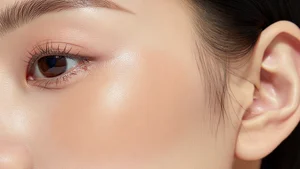
Eye Enhancement
Eyes draw attention in portraits. Subtle brightening of iris and catchlights makes eyes pop without looking fake.
Whitening sclera (white part) helps but don't make it pure white. Natural eyes have slight warmth and tiny blood vessels.
Sharpening eyes draws focus appropriately. But over-sharpening creates harsh unnatural edges.
Hair and Detail Preservation
AI enhancement sometimes softens hair too much. Preserve hair texture and flyaway strands for natural appearance.
Fine details like eyelashes, eyebrows, individual hair strands. These add realism. Don't let enhancement blur them away.
The AI headshot generator maintains detail well but always verify enhancement preserves important features.
Background Considerations
Portrait backgrounds can be blurred, cleaned up, or replaced. But subject must still look naturally placed in their environment.
Edge quality around hair and face matters enormously. Poor masking creates obvious halos or cutouts.
Background blur (bokeh) should look like shallow depth of field photography, not AI smudge. Study how real camera bokeh appears.
Professional Delivery Standards
Client portraits for professional use require higher quality standards than personal social media posts.
Corporate headshots, wedding photos, portfolio images. These need subtle enhancement that survives close inspection.
Check enhanced portraits at 100% magnification. Artifacts invisible at thumbnail size become obvious when printed large or displayed high resolution.
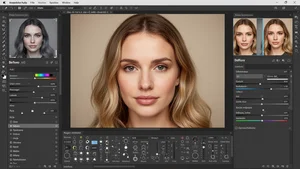
Batch Portrait Enhancement
When enhancing multiple portraits from same session, maintain consistency. Similar enhancement levels across all images.
Create enhancement preset that works well, apply across batch, then individually adjust outliers. Faster than starting fresh each image.
Different poses and angles from same person might need varied enhancement. Profile versus front view, different lighting angles.
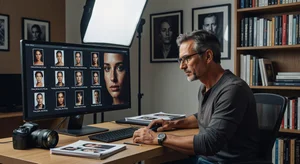
My Enhancement Workflow
Start with AI automatic enhancement to see baseline improvement. Evaluate what works and what needs manual adjustment.
Reduce any over-processing. AI tends toward too much enhancement. Dial back for natural results.
Check skin, eyes, hair separately. Ensure each element enhanced appropriately without losing character.
Compare enhanced version to original frequently. Easy to drift too far from natural appearance without reference.
Export for client review before final delivery. Their preferences matter more than my artistic vision for their portrait.
Portrait enhancement improves photos while preserving the person's authentic appearance. Master subtle enhancement that helps subjects look their best without creating artificial perfection. That's the difference between professional retouching and heavy-handed filtering.